
Split Body and Trim Body are features built into TransMagic Expert, which allow you to set a split-trim body, and use that body to affect a second body by spliting the body, or trimming the body.
In the overview image at right, you can see an example of each; in the first example, a sphere is being used as a split body to generate edges where that that model intersects the larger cell phone case. In the second example, a cube is being used as a trim body to trim away that exact mass from the larger cell phone case.
Split Body
Let’s say you want to capture the edges of a sphere (or any model) as it intersects a mobile phone case. Figure 1 shows an example where the sphere has been placed in the middle of the part, so that it intersects it.
1. Set your Split-Trim body by selecting the sphere (You can do this using the Single Select arrow and double-clicking on any part). Then, from the MagicHeal toolbar, click Set Split-Trim. This is shown in figure 1.
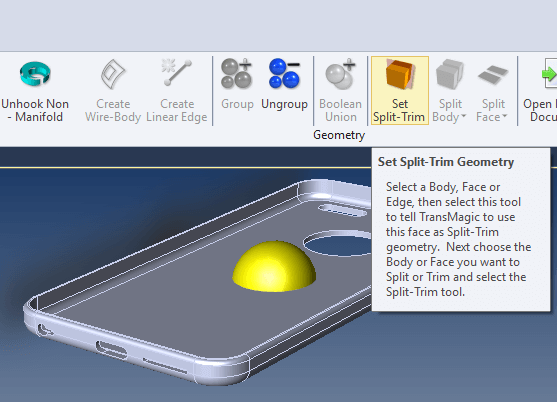
Figure 1 – Select the body to trim with, then click Set Split Trim.
2. Select the part you want to split or trim (again, using the Single Select arrow). Click on Split Body, or Trim Body. Split Body is being selected in this case (figure 2).
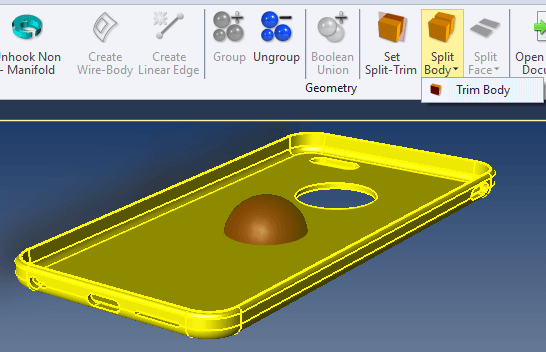
Figure 2 – The model to be affected is selected, and the Split Body button is clicked.
3. If you remove the Split Trim body (the sphere), you will see that it has left a round edge scribed into both faces of the mobile phone case (figure 3). This edge can then be used for a multitude of purposes, such as visualizing interferences with other parts, construction geometry for sweeps, or locating downstream geometry or operations.
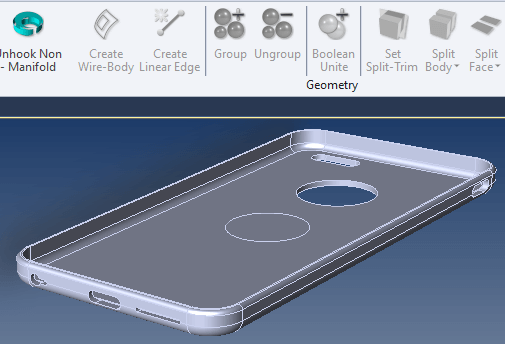
Figure 3 – Once the Split Body solid (the sphere) is removed, a split in the mobile phone body is all that remains.
Trim Body
In this example imagine that you want to remove the volume of a cube from the mobile phone case.
1. Figure 4 shows the selected cube and the Set Split-Trim button being clicked.
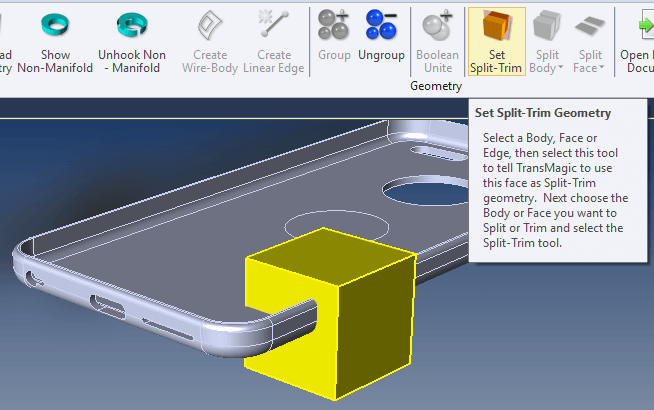
Figure 4 – Select the cube, click Set Split Trim.
2. In figure 5, Trim Body is being clicked to trim the Split-Trim body away from the mobile phone case. Note that Trim Body is in the lower half of the Split Body button.
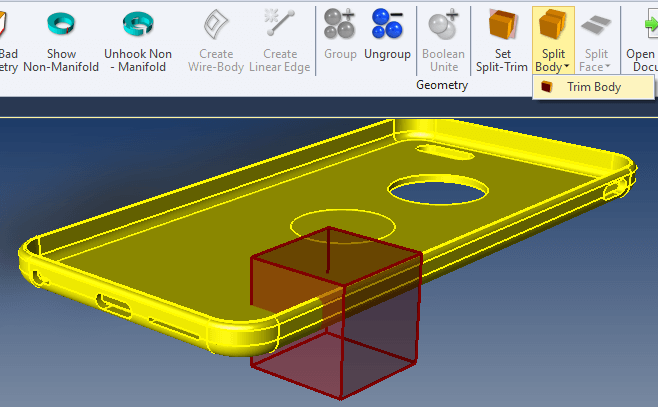
Figure 5 – Select the cell phone body and click Set Trim Body.
3. As with the previous example, if you remove the cube, you can see the result in figure 6; the volume of the cube has been subtracted from the mobile phone case.
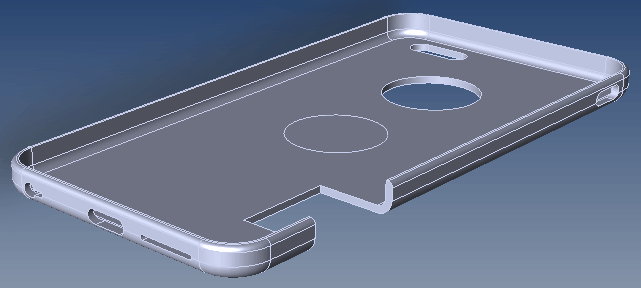
Figure 6 – The result of the Trim Body operation, once the trimming body has been removed.
Split Face & Trim Face
Similarly to Split Body and Trim Body, there is a dual button for Split Face and Trim Face (on the MagicHeal toolbar). First select Set Split Trim with a solid body, and then select one or more faces using the Single Select or Window Select tool; then click Split Face or Trim Face to affect the target faces.
Removing the Split-Trim bodies
If you want to remove a split trim body from the scene, simply select the body with the Single Select arrow and click the Delete key on your keyboard, or select the body and right-mouse button click to activate the right-mouse button menu; then click on Hide Part(s). You can always bring the part back by using the same right-mouse button menu; Show > Show All. Trim Body is the equivalent of a boolean subtract.