 This article will demonstrate how materials are applied to models in TransMagic R12, and how parts and assemblies can then be interrogated for Mass Properties.
Mass properties are particularly useful if you are generating quotes or estimates, and need to know the weight or volume of materials for the part or complete assembly. Another common use for mass properties is to get the volume calculation for estimating 3D printing print times and material costs.
The Mass Properties dialog box also provides moments of inertia and allows you to create three planes that intersect at the centroid.
Applying Materials
Parts should already have a default material assigned; if you want to see or change the material, use the Assembly Browser (accessible via the Home toolbar) and access each part’s material by clicking the ‘+’ next to each part name.
In figure 1 below, the materials of the uppermost three parts have been exposed, and the gear component has been selected,causing it to highlight in the browser as well as turn yellow (selected) in the window area.
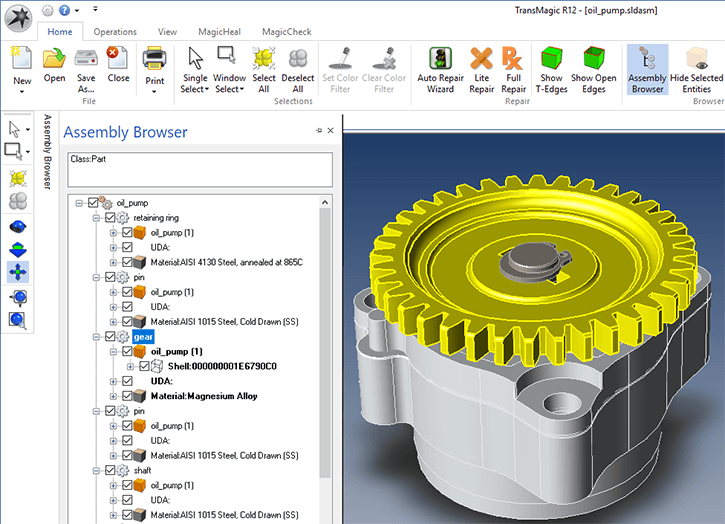
Figure 1 – Materials can be accessed via the Assembly Browser
Mass Properties
In figure 2 below, the Mass Props button on the Operations toolbar has been selected; it’s important to have at least one part selected before clicking Mass Props, otherwise Mass Props will be grayed out. In this figure you can see the Mass Properties dialog box and the centroid calculation.
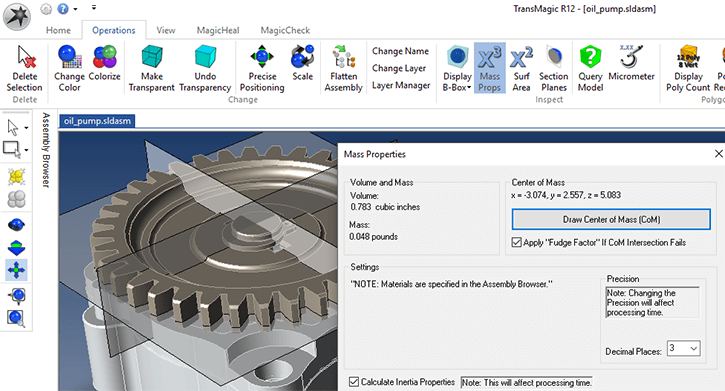
Figure 2 – Mass Properties dialog with centroid calculation.
Editing Materials
As figure 3 indicates, just right click on any material you want to edit; this will reveal an Edit Material button which, when clicked, will launch the Material Properties Dialog.
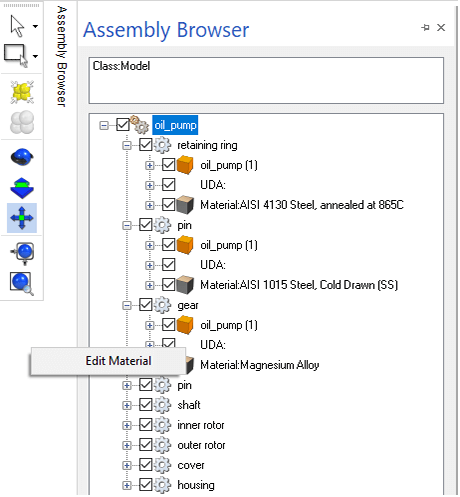
Figure 3 – Right click to edit any material.
Material Properties Dialog
Once you’ve clicked the Edit Materials button, the Material Properties Dialog will launch, allowing you to select any pre-defined material, or input your own custom material. In figure 4, we are inputting Cast Iron as the new material for the gear; cast iron weighs more but might wear better than the magnesium.
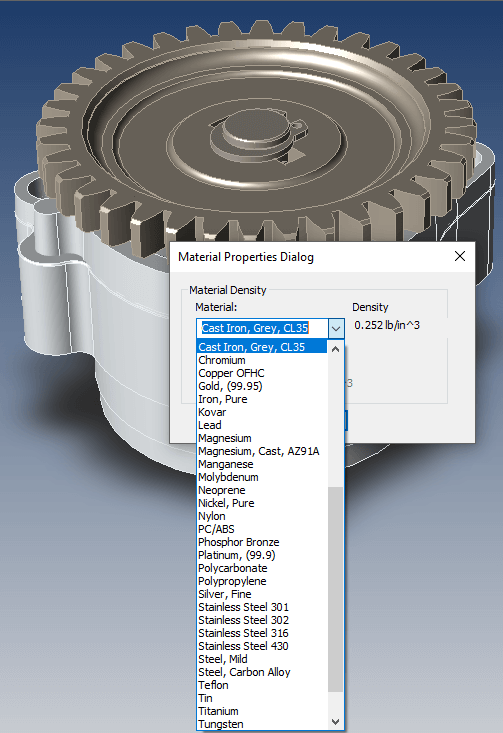
Figure 4 – The Material Properties Dialog will allow you to select materials.
Mass Properties Comparison
Now we can select the entire assembly and check mass properties; an easy way to select the entire assembly is to use the Select All button on the left side toolbar – then click the Mass Props button. In figure 5 we are comparing the weight of the assembly when the gear was magnesium versus when it is cast iron.
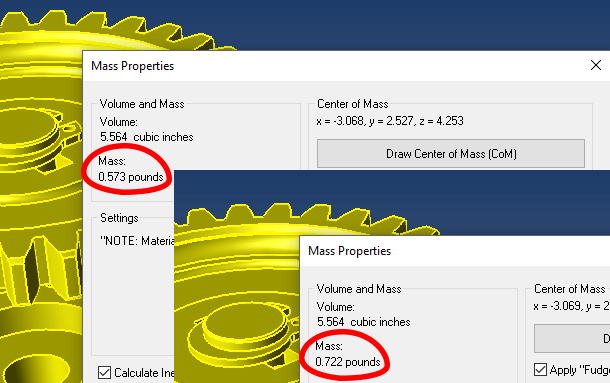
Figure 5 – Comparing the assembly before and after changing the gear to cast iron.
We hope this article has been useful to you. If you have any questions or comments, please direct them to social@transmagic.com