Some of the tools in TransMagic can be lifesavers when you need them, and they often can work together like a Swiss army knife; two such tools are Flatten Assembly and Convert to Assembly.
It is important to note that usually our customers either use one or the other of these tools to solve disparate problems. An application came up recently that allows us to use both of these tools together – here’s the workflow to go from an unusable, multibody DWG to a valid assembly file:
DWG File Structure Before Flattening
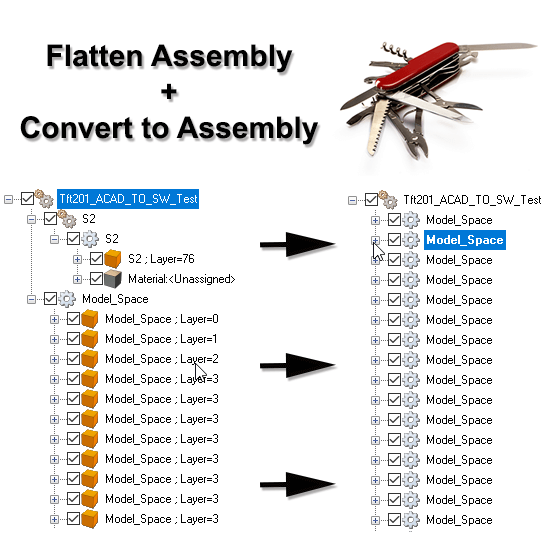
Files generated in AutoCAD Modelspace were imported into SOLIDWORKS, but the parts in the assembly weren’t showing up. When the DWG file was opened in TransMagic, it was somewhat of a mysterious mess (see figure 1). By looking at the Assembly Browser, you can see the structure certainly does not indicate a lot of parts (parts are indicated by a single spur gear, and assemblies are indicated by a double spur gear). What we have here is an assembly, containing a subassembly and a single ‘Model Space’ part which itself contains numerous solid bodies (solid bodies are indicated by orange cubes).
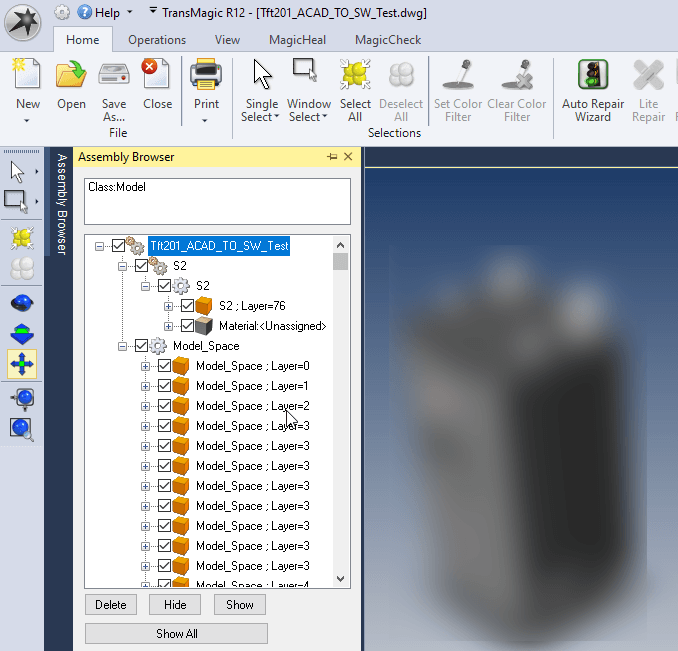
Figure 1 – Drawing file structure before flattening.
Flatten Assembly
The first step in this case is to Flatten the Assembly. Figure 2 demonstrates that this button is on the Operations toolbar. Flatten Assembly is all that is required in some cases, for example if you want to convert a true assembly file containing parts into a single part with multiple solid bodies, for whatever downstream application you might have. In this case, however, we are flattening the assembly to clean it up, so that all the solid bodies are at the same level, so that we can then convert it into an assembly.
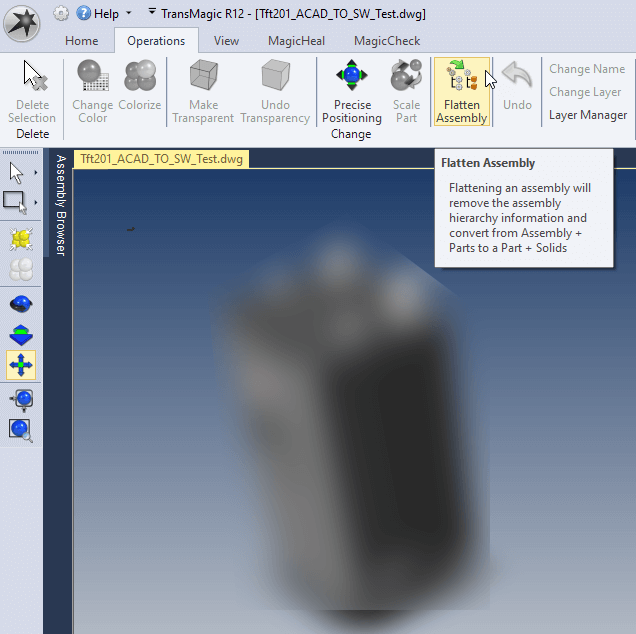
Figure 2 – Where to find the Flatten Assembly button.
File Structure After Flattening
Figure 3 shows what happens to the file structure once the assembly has been flattened. Notice that we have all the solid bodies are at the same level now.
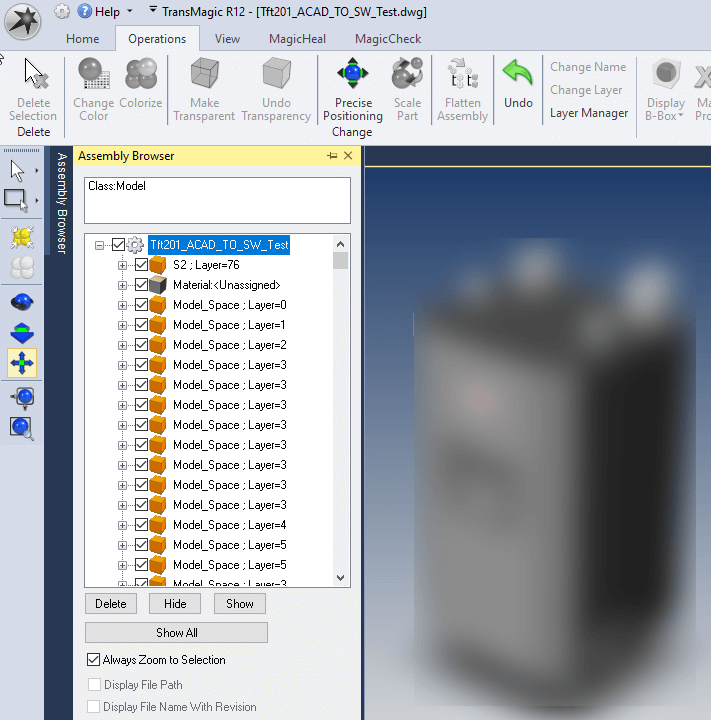
Figure 3 – File structure after flattening.
Convert To Assembly
For figure 4, the Assembly Browser has been pinned to the screen. Right-click on the uppermost part and select Change > Convert to Assembly from the right-button menu.
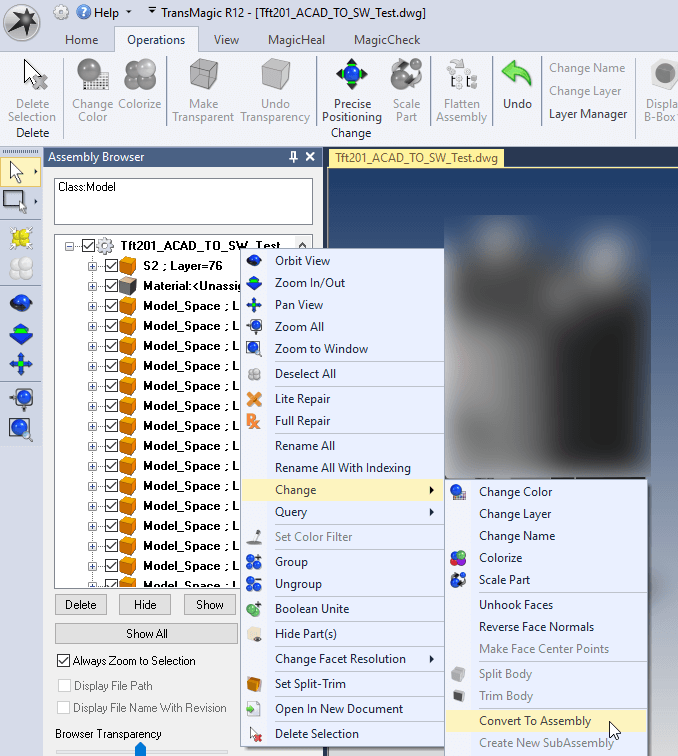
Figure 4 – Where to find Convert to Assembly button.
Corrected File Structure
Figure 5 shows the result of Convert to Assembly; instead of a single part with multiple solid bodies, we now have a single assembly with multiple parts. Note that one of the parts is highlighted in the Assembly Browser, which causes TransMagic to zoom to the same part and highlight it yellow on the display area at right. Now we’re ready to save this file to Parasolid so that it can be sent to SOLIDWORKS.
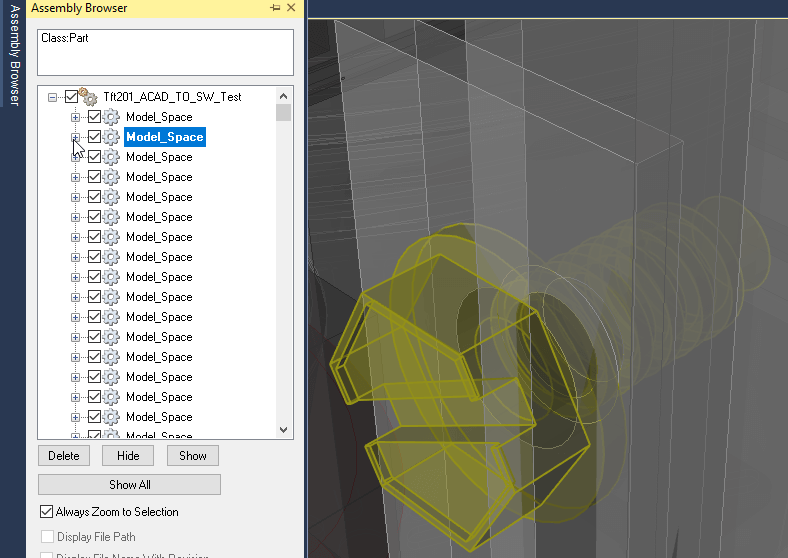
Figure 5 – Evidence that we now have valid parts.
To save the file, click Save As from the Home toolbar. Save As will bring up a dialog box that will allow you to choose the format you want to save to.
Save As Type
Figure 6 displays the Save As dialog box. Note the arrow indicating that Parasolid is the best format for sending data to SOLIDWORKS. However if you have Expert, and a working license of SOLIDWORKS is installed on your machine, you can also save to SOLIDWORKS formats .sldprt and .sldasm; however, these formats are essentially a Parasolid file in a wrapper, since Parasolid is the geometric modeling kernel used by SOLIDWORKS.

Figure 6 – Save As Type: Parasolid
The Corrected File In SOLIDWORKS
Figure 7 shows the processed file opened in SOLIDWORKS; you can see an assembly at the top of the feature tree, and multiple parts below.
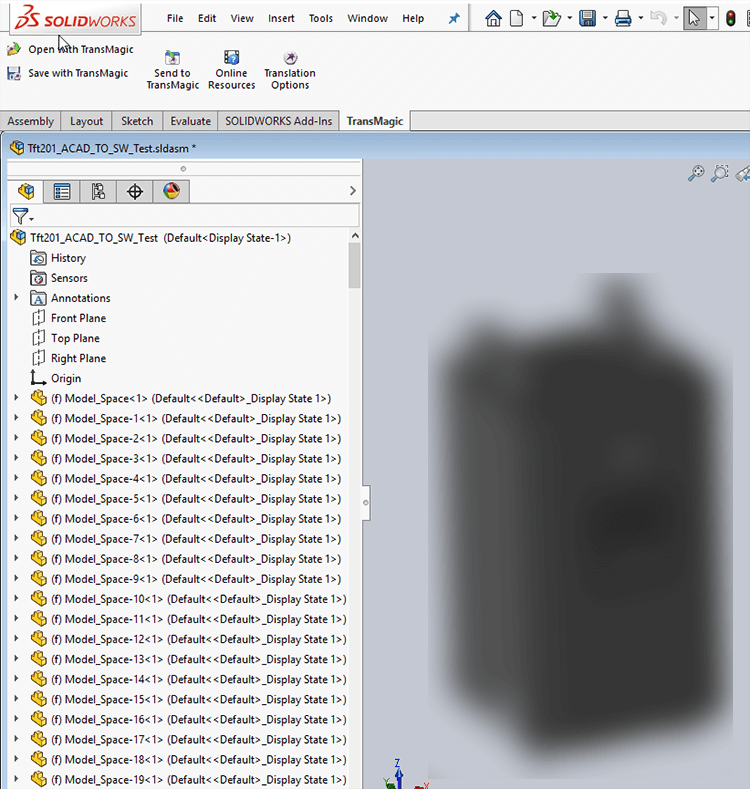
Figure 7 – The corrected file open in SOLIDWORKS.
Summary: So the bottom line is that if you get a DWG with unusable Model Space solid bodies, you can flatten the assembly, then convert to assembly and have a working assembly in SOLIDWORKS in short order.