 Imagine that you have a part or assembly that is difficult to repair; what you’re after is a watertight solid. Here’s a classic repair scenario that demonstrates the use of different selection modes in the context of a repair situation.
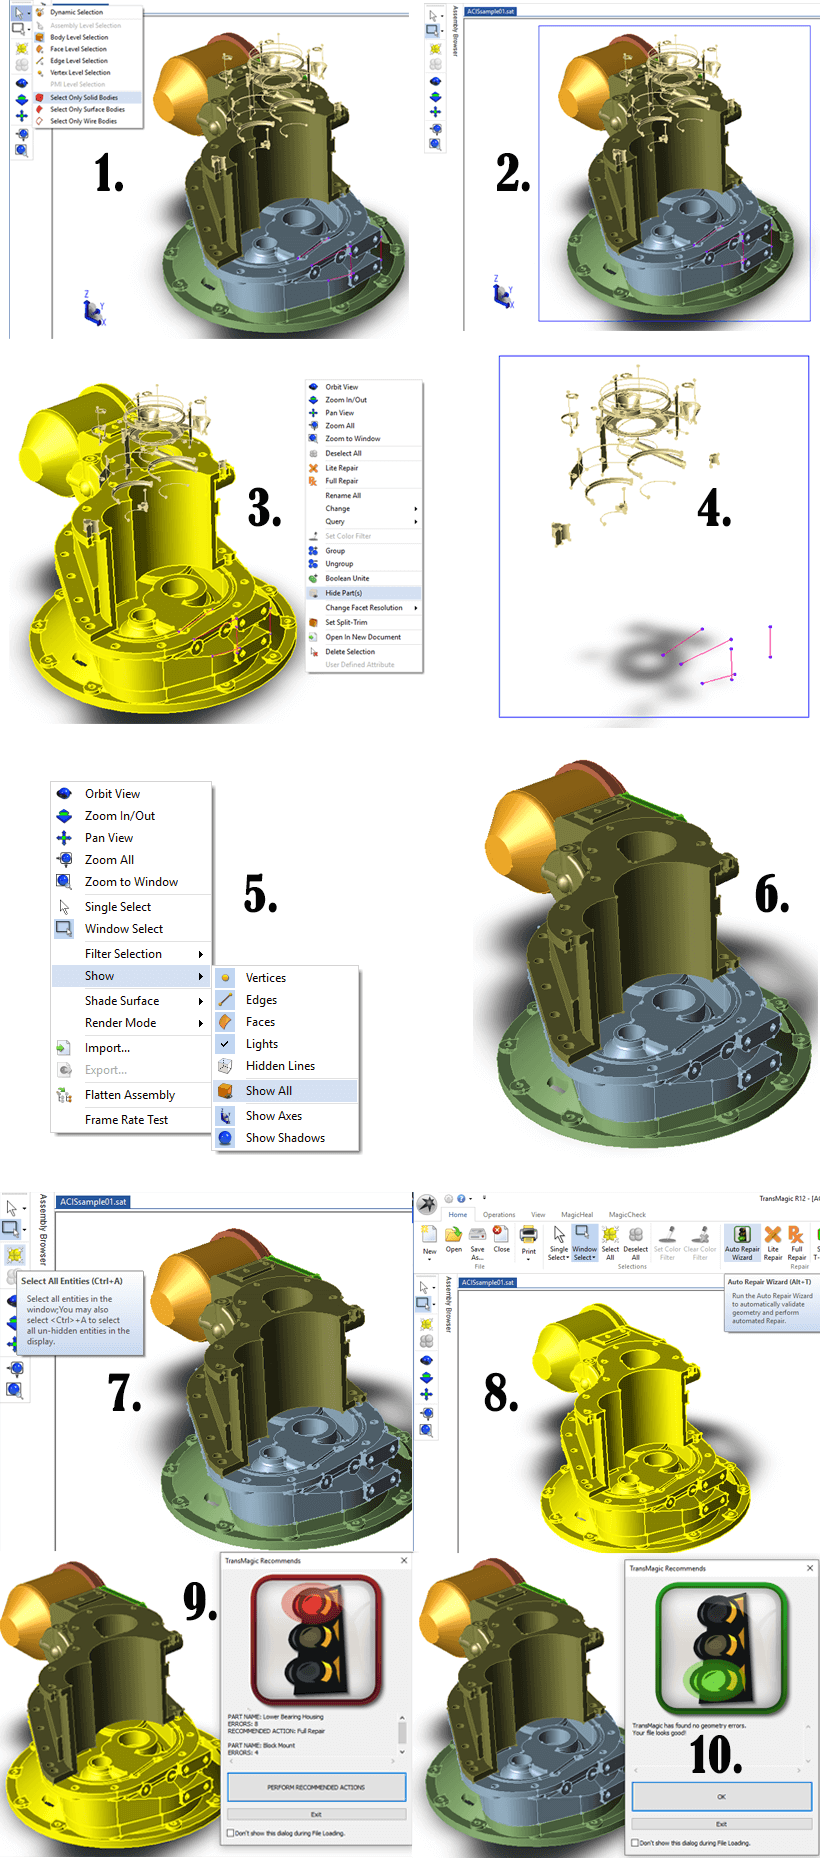
The main purpose of this process is to delete any construction or ‘scrap’ geometry that may be interfering with the repair process; such ‘scrap’ has been artificially created for this example, but it’s common enough in real-world examples. TransMagic has other techniques and tools, but this is one of the more common and effective. We’ve broken this process down into ten steps, below; see numbered screenshots at bottom of page for visuals.
A Step by Step Repair Process
- Make sure selection mode is set to Select Only Solid Bodies..
- Use the Window Select tool to window around the entire assembly. In this image you can see that Window Select is active, and there is a blue box being drawn around the entire assembly.
- Now that all the solid geometry is selected, it will turn yellow. Right mouse-click and choose Hide to hide the selected solids.
- At this point all the solids are hidden, leaving only the construction and other unwanted geometry. De-select the Select Only Solid Bodies option, and set selection mode to Body Level Selection; then use the Window Select tool to window any remaining ‘non-solid’ geometry. Note the blue window being drawn around the geometry. Then click Delete on your keyboard.
- Right-click the mouse on the screen and from the right-click menu, choose Show > Show All, to make the solid geometry visible.
- At this point you should only be seeing solid model geometry
- Use the Select All selection tool to select all visible geometry.
- The entire model or assembly should be highlighted yellow; click the Auto Repair Wizard (ARW) to begin the repair process.
- In this case, the ARW returns a red light, meaning there are problems (such as self-intersections) with the geometry, necessitating Full Repair. The ARW can also return a yellow light, which would indicate missing faces (open circuits). In any case, we simply click Perform Recommended Actions to initiate the repair.
- The green light signifies that this model is in good condition and a watertight solid model.
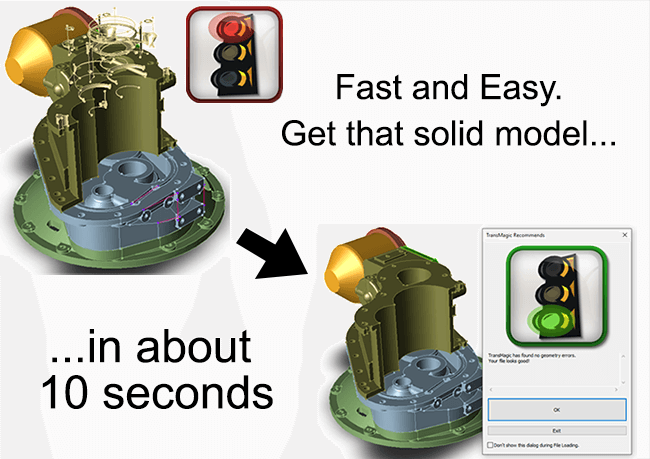
Though this process does have ten steps and may appear complex, but once you follow the logic and know which buttons to press, it can be done in about ten seconds (including the actual repair time!).