Choosing Your Selection Options
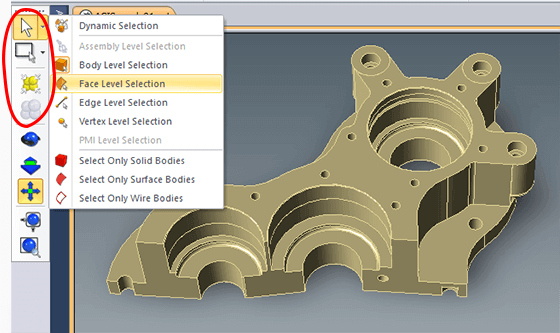
At first glance, it looks as if there are only four geometry selection options in TransMagic – Single Select, denoted by an arrow, Window Select, denoted by a rectangle, Select All Entities and Deselect All Entities (see screenshot at right). However, there is a drop down arrow to the right of the top two buttons, which allows you to filter out entities. Selection filters can be applied in the following ways.
- Dynamic Selection
- Assembly Level Selection
- Body Level Selection
- Face Level Selection
- Edge Level Selection
- Vertex Level Selection
- PMI Level Selection
- Select Only Solid Bodies
- Select Only Surface Bodies
- Select Only Wire Bodies
When to use what?
In this post we will just cover three options – Dynamic Selection, Body Selection and Face Selection, as they are some of the most commonly used options. After a little exposure to these selection modes, the remaining modes will make more sense.
Dynamic Selection
Dynamic Selection is the default; in this mode, if the Single Arrow Select is active, you can click on any model and your first click will select a face; if you click again, you’ll get a solid body or a part, depending on if you are in a part composed of solid bodies, or a true assembly composed of parts. Clicking again will select the entire assembly, or sub assembly, whichever is smaller – and you can keep on climbing the tree to the master level assembly, assuming you have an assembly file open.
Body Selection
Body Selection will select the entire solid body or part – this can be a good way to select and repair specific bodies, or select and hide or delete bodies when wrestling with a massive file.
Face Selection using Single Selection arrow
Sometimes when performing repairs on surfaces you’ll see a face that is simply too damaged to repair, and it needs to be deleted – going into Single Select Face mode will allow you to click on that face and delete it, or ‘replace’ it if you have access to MagicHeal tools.
Face Selection using Window Selection
You can also window a group of faces to select them; simply press-drag-release the left mouse button and all faces that fall within that window, or cross that window, will be selected (See figures 1 & 2).
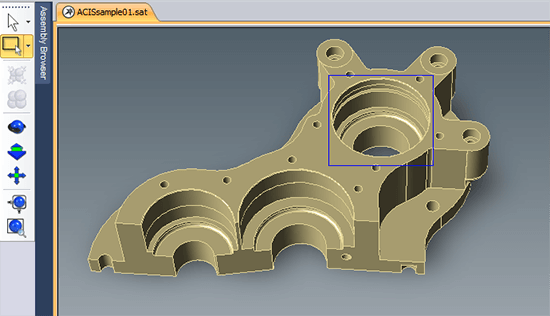
Figure 1 – Windowing selects all pertinent geometry within the window, and crossing the window.
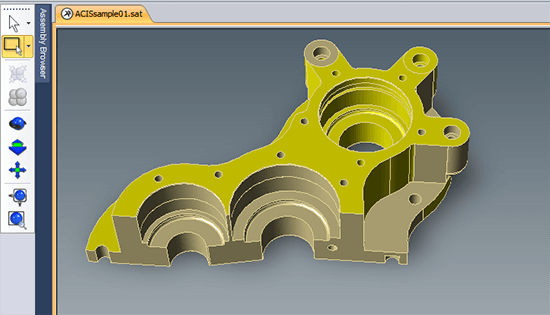
Figure 2 – The result of a Window Select is shown highlighted in yellow.
Ignoring Back Faces
If you need to select several faces, but do not want to accidentally select faces on the ‘backside’ of the part (back faces are relative to whatever view you happen to be in at the moment), you can hold down the control key while dragging the window selection.
We hope this post has been of interest to you; we welcome your comments or suggestions at social@transmagic.com!