Model-Based Definition (MBD): The Easy Way
TransMagic On-Boarding: Lesson 4 of 7
(to see all of the On-Boarding lessons, click here)
TransMagic created 3D CAD data power tools for all manufacturing professionals. Most of our tools focus on the need to TRANSLATE, VALIDATE, DIAGNOSE, and REPAIR 3D CAD data. We also have capabilities that enable you to extend the use of your 3D models that include VISUALIZATION and COLLABORATION.
MBD is a little different. The goal of MBD is to reduce or even eliminate the need for 2D drawings. TransMagic gives you access to all the MBD (product manufacturing information, GD&T, etc.). Using MBD doesn’t have to be difficult. TransMagic makes it easy to use.
MBE Outflows
TransMagic can save graphical MBD to any 3D format, and semantic MBD to formats such as JT or 3D PDF. MBD can be incorporated into any workflow, drastically improving cross-departmental information flow and transparency. Step AP242 format is also supported, which can carry MBD information as well.
In the cases where MBD/PMI is not supported in the destination format, TransMagic can convert this information into wire bodies (edges) which are supported by all formats. This means anyone can have full access to this manufacturing information, even non-technical employees. This same format can be used with WebGL so that it can be hosted on a website (internal or external).
Lesson #4: MBD the easy way (be sure to check out the video at the bottom of this page)
- Start TransMagic
- Click Open
- TransMagic installs with many sample files. This directory is located here:
- “C:\Users\Public\Documents\TransMagic\Sample Files”
- Load the file …”Sample Files\CATIA V5\V5Sample01.CATPart”
- TransMagic will open a part that has PMI data attached, as shown below.
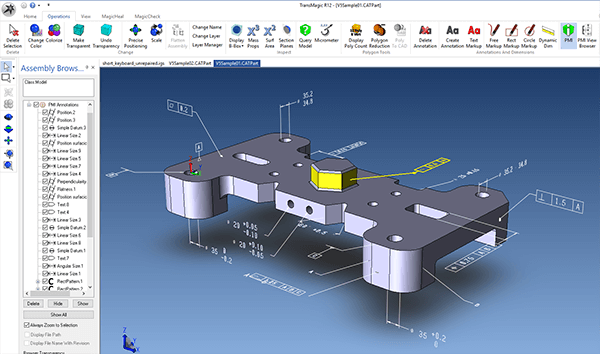
- To see where individual tolerances are attached, select the note or tolerance with the Select arrow; the associated geometry will highlight (as shown in
screenshot above). - To access the PMI View Browser, click PMI View Browser from the Operations toolbar.
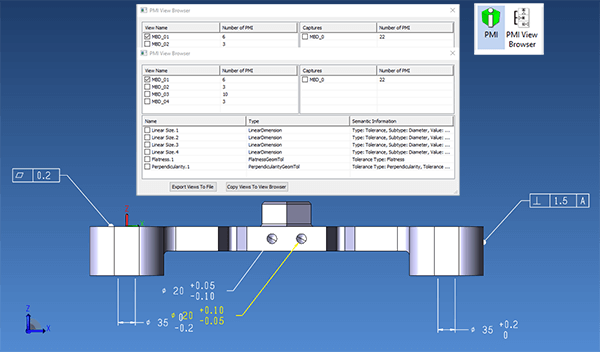
- To save PMI views to 3D PDF, select Export Views from the PMI View Browser dialog box, and choose 3D PDF from the list of options. 3D PDF files are viewable by anyone who has the Adobe Reader.
Thanks for taking the time to review this lesson. If you have questions, please email us at support@transmagic.com or reach out to us via chat from transmagic.com.
This is lesson 4 of 7 of the introductory on-boarding series for TransMagic. Visit TransMagic On-Boarding for a list of all the lessons.
Please feel free to share this lesson with others in your company. They can get their own trial by visiting this page TransMagic.com/get-a-trial.